
Disclaimer: This post includes affiliate links. This means that if you click on these links and make a purchase, I will earn a small commission. This commission is at no additional cost to you. For more information, see our Privacy Policy.
So, you want to start a blog, but every time you Google it, you’re faced with jargon, complicated tech setups, or people trying to sell you a million different tools.
Sound familiar?
If that’s the case, then first of all, hi, and welcome.
I’ve written this post for people exactly like you. People with no coding experience, who don’t want the fancy lingo, and have a big desire to get their thoughts and experiences out into the world.
Why listen to me? Well, yes, this blog is relatively new, but I’ve been building websites since FrontPage was a thing and have been blogging for well over 7 years.
So, whether you want to share your story, teach people something, or build a brand, blogging is a brilliant place to start. And I’m here to walk you through the entire process, step by step, using WordPress.org and Hostinger (my top recommendation for affordable and beginner-friendly hosting).
Let’s get stuck in, shall we?
Step 1: Decide What You Want to Blog About
First up, you don’t need to have your entire blog mapped out to begin blogging. Having a rough idea of your niche or themes for your intended blog helps, but you don’t need every post that you’ll ever write completely planned out. Sometimes, you’ve just got to start with a vague idea and get the skeleton of your blog up and running.
Maybe you want to write about mental health, motherhood, podcasting, fashion, food, or your personal journey.
Maybe you’re not sure yet. That’s okay too.
Your blog can evolve over time, and that’s the beauty of it.
In the past, I’ve blogged about parenting, study skills, podcasting, travel, and now I write on this blog about issues about violence against women and girls. It’s varied, but each of those blogs evolved over time.
If you’re stuck choosing what to blog about, ask yourself:
- What could I talk about for hours?
- What do friends come to me for advice about?
- What experiences have shaped me that others might relate to?
Remember to keep your blog content real. People like to read content from people that speaks to them as individuals. Not content that reads like a school essay.
Step 2: Choose Your Blog Name and Domain
Once you’ve got a rough idea of your topic, it’s time to pick a blog name. Ideally, your domain name (the URL people type in to find your site) will match or be closely related to your blog name.
A few quick tips:
- Keep it short, memorable, and easy to spell
- Avoid hyphens and numbers if you can
- Think long-term—will the name still work if your content expands later?
If your ideal domain isn’t available, try small variations.
Ultimately, you want to keep your domain name short and memorable, and not complicated to spell.
You want people to be able to quickly and easily remember your domain name so that they can visit again. People won’t remember something overly complex, witty, long, or with unique spellings.
Step 3: Set Up Hosting (Hint: Use Hostinger)
Here’s where a lot of beginners get overwhelmed, so I’ll keep it simple. Hosting is what makes your blog visible on the internet. Without it, your blog is just a bunch of files sitting in space.
If you go to Google and type in ‘WordPress hosting,’ you’ll likely get so many hits that you’ll spend the next few hours of your life reading all of the options and come away still feeling none the wiser.
I recommend Hostinger because it’s:
- Affordable – WordPress hosting through Hostinger starts from just $2.99 per month
- Super beginner-friendly
- Fast and reliable service
- Exceptional customer support
- One of the very, very few WordPress hosting platforms actually recommended by WordPress itself
👉 Get started with WordPress with Hostinger and get 20% off your subscription
Not only all of that, but when you purchase WordPress hosting through Hostinger, you also get:
- A free domain for the first year of your plan. This is a huge saving considering how expensive some domain names cost! Getting your domain through Hostinger as part of your hosting also makes things way easier to set up, rather than if you purchase your domain from one place and hosting from another. This way, Hostinger just sorts everything for you in one setup process.
- Email addresses and mailboxes. Now you can have an email that’s aligned with your website domain name and not a random Gmail or Outlook address.
- A free SSL certificate for your domain. This is the thing that puts a little padlock at the front of your website address in your web browser. An SSL certificate shows visitors that your website is safe to use. Like a domain name, you can purchase an SSL certificate somewhere else, but Hostinger give you one as part of your WordPress hosting and activate it for you as part of your set up.
What to do:
- Click the Hostinger link above to get 20% off your subscription.
- Choose a plan. The Premium plan for $2.99 per month is a great start; however, in my opinion, it’s better to skip straight to the Business plan (even if you don’t have a business). It’s $3.99 per month, and for that one extra dollar, you get daily backups of your website (as opposed to weekly), better website optimisation (hello speedy website!), WordPress AI tools. To be honest, the extra $1 per month is worth it just for the daily backups alone.
- Register your domain (or connect one if you already have it).
- Complete your purchase.

Step 4: Install WordPress.org
This is the bit that scares most people, but it’s nothing to worry about.
Why? Because if you purchase WordPress hosting through Hostinger, they will install WordPress for you with just one click from you.
When you purchase your plan, as part of the setup of your Hostinger plan, you will be guided through the setup of WordPress. They really couldn’t make it simpler. You just need to follow all of the on-screen instructions.
Alternatively, once you have purchased your web hosting, you can install WordPress this way:
- Log into your Hostinger dashboard
- Go to Websites > Create or Migrate a Website
- Choose WordPress when asked how you want to build your site
Boom. WordPress installed and you’re ready to go.
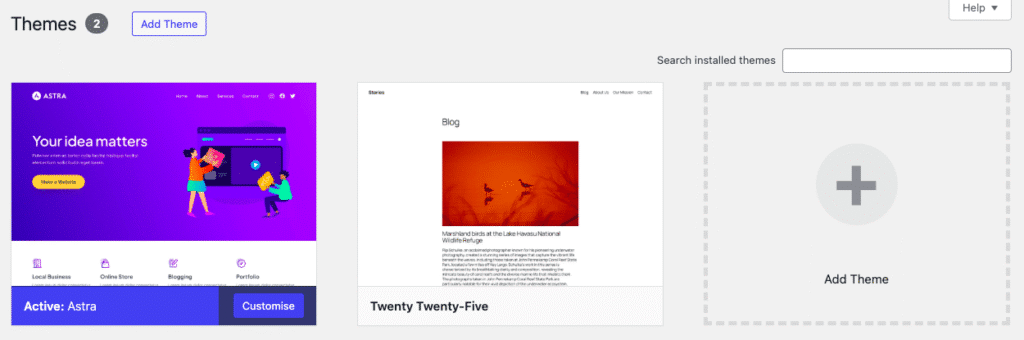
Step 5: Pick a WordPress Theme
A theme is what makes your blog look good. There are tons of free and paid themes, but don’t get lost in the rabbit hole.
I use Astra. It’s free and is highly customisable. It’s also very lightweight. What this means is that it is fast to run and, unlike some themes, won’t slow your website down.
To install a theme:
- Go to your WordPress dashboard
- Click Appearance > Themes > Add Theme
- Browse the free library or search for a specific style (I love Astra or Kadence for beginners)
- Click Install, then Activate
Don’t worry if it doesn’t look perfect straight away. You can tweak as you go.
To amend how your website looks, click Appearance > Customizer and play around with the settings until you’re happy with how your blog looks.
Remember not to get too carried away with how your blog looks at the minute. It’s better to get content online and giving it time to rank in Google then delaying publishing any content because your site doesn’t look ‘perfect.’
Tweaking your site and improving its appearance is lots of fun.
But it can also be a huge drain on your time. I think it’s better to get your basic site settings sorted in your theme and get working on your content as soon as possible. You can always work on your blog’s appearance when you have writer’s block or aren’t inspired to write, but want to work on your blog.
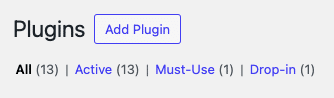
Step 6: Install a Few Key Plugins
Plugins are like apps for your blog. They add features like contact forms, SEO help, and security.
You can install plugins to make your website do pretty much anything you want it to do. However, it’s important to be choosy, because too many websites can slow your site, or even break it.
To start off, these are my recommendations:
- Wordfence – basic security for your website
- CookieYes – to keep your site compliant with data protection legislation
- RankMath – to help you optimise your site for ranking in search engines
To install a plugin:
- Go to Plugins > Add New in WordPress
- Search for the plugin you want to install, click Install, then Activate
- Once activated, most plugins will take you to setup options to help you setup the plugin correctly
For a full list of my top-rated plugins, check out this post >> 10 of The Best WordPress Plugins for Bloggers (That Won’t Slow Your Site Down)
Step 7: Write Your First Blog Post
Here’s where the fun begins. Don’t worry about getting it perfect; just start writing.
Blogging is like anything; it’s a skill, and skills need to be practised and honed to improve. But you can’t get better at blogging if you don’t write and hit ‘Publish’ on your first post. You can always edit a post later down the line as your blog writing skills develop.
Some first post ideas:
- An introduction to who you are and why you’re blogging
- A personal story that relates to your blog topic
- A list of things you’ve learned in your niche
Writing tips:
- Use short paragraphs
- Write like you speak
- Use headings and bullet points
- Don’t overthink it
- Break your content up with images if you want to
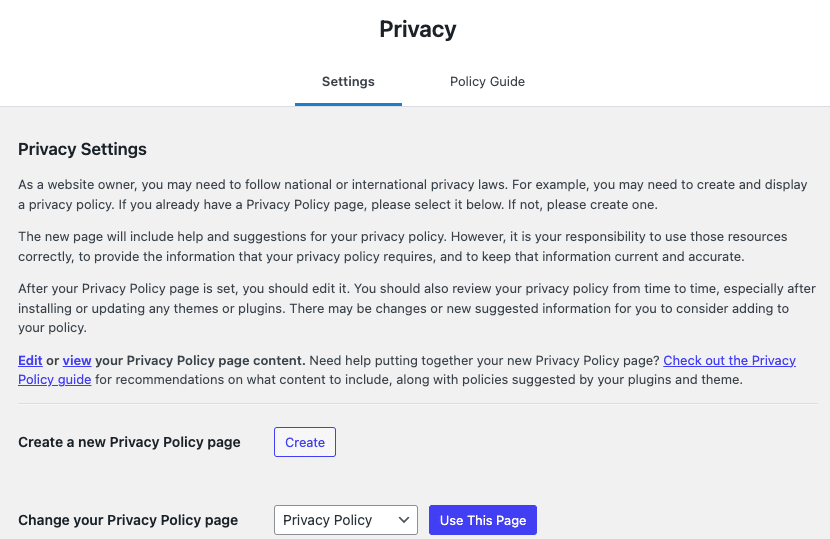
Step 8: Create Essential Pages
Aside from your blog posts, your blog needs a few essential pages. What counts as ‘essential’ won’t be the same for everyone, but here are 3 pages most blogs will have:
- About. This is so your readers know who you are and what your blog is about.
- Contact. Not completely necessary, but if you want people to contact you, you need to give them a way to do so.
- Privacy Policy. This is a non-negotiable and cannot be avoided. WordPress makes this simple, though. Simply go to Settings > Privacy, and WordPress help you set up your Privacy Policy with ease. You can read their guide by clicking on the link.
Step 9: Launch Your Blog!
Take a deep breath and hit publish.
Seriously. You’ve done the tech part, so don’t let fear of “not being ready” stop you.
Blogs evolve.
What matters is getting started.
If you want, you can let your friends and family know about your blog. You might want to share news about your blog on social media. Equally, you might want to remain anonymous and set up separate social media accounts for your blog and not share your new venture with friends and family yet, if ever.
And remember: done is better than perfect.
Step 10: Keep Going and Stay Consistent
Success doesn’t happen overnight. But blogging regularly, even once a week, helps to build momentum. By committing to writing regularly on your blog, you’ll:
- Get better at writing
- Start ranking on Google
- Build a little community of readers
Create a simple content plan with a few post ideas each month. You don’t need to post daily; just show up consistently. For me, this started out with one blog post every two weeks. This steadily increased to a post a week, and now I regularly try and publish 2 new blog posts per week.
Step 11: Learn the Basics of SEO
SEO (Search Engine Optimisation) helps people find your blog via Google.
Here are some basics SEO tips to get you started:
- Use keywords (like “how to start a blog”) in your title and headings
- Add meta descriptions with RankMath
- Include internal links (link to your other posts/pages – you might need to go back and add these into your earlier posts as your archive of posts grows)
- Use images with descriptive alt text
Step 12: Monetise Your Blog (If You Want To)
Once you’ve got some content, you might want to start earning from your blog. A few beginner-friendly ideas include:
- Affiliate Marketing: Like my Hostinger link above, if someone signs up for a product or service via your link, you earn a commission.
- Sponsored Posts: Get paid to write about products/services/causes/topics that you love.
- Ads: Add Google AdSense or another ad network to your blog once you’ve got traffic.
- Sell Your Own Products: Ebooks, templates, or courses, can all be sources of income.
Don’t rush this to monetise, though. Focus on providing value and building your blog and audience first. Small steps that are strategic and well-planned are better than trying to do everyting at once and then quitting because you feel that nothing is working.
Final Thoughts
If you’ve made it this far! Well done.
Starting a blog can feel overwhelming, but if you follow these steps, you’ll be up and running without needing a degree in computer science.
So go on—tell your story. Share your thoughts. And if you’re going to use Hostinger, don’t forget to click through my affiliate link to get 20% off your WordPress hosting.
Frequently Asked Questions
What’s the difference between WordPress.com and WordPress.org?
WordPress.com is a hosted platform, meaning you’re limited in customisation and monetisation. WordPress.org is self-hosted (you own everything) and gives you full control, especially when hosted with Hostinger.
Is blogging still worth it in 2025?
Absolutely. People are looking for relatable content, real experiences, and honest voices more than ever. Whether you want to blog as a hobby or turn it into a side hustle, now is a great time to start.
How much does it cost to start a blog?
This is like anything; you can pour as much or as little into your blog as you want. But the more money spent doesn’t always mean a better site. With Hostinger and WordPress.org, you can start for as little as a few dollars per month. Domains are often free in your first year with hosting packages.
Do I need to know coding?
Nope! WordPress and Hostinger are designed to be used without any coding knowledge. It’s very much drag-and-drop, click-and-go.
How often should I blog?
Start with a realistic goal; maybe once a week or every other week. Consistency and quality is more important than quantity.
Can I change my blog name later?
You can, though it’s easier to choose one you’re happy with from the start. You can also rebrand as you grow. On saying that, though, you might not be able to change your domain name, unless you want to pay for a new one.
How long does it take to get blog traffic?
It varies, but most experts say that new blogs take 3–6 months to gain traction, especially from Google. Be patient, enjoy the journey and keep writing.